There is a revolution taking place in the world of growing garlic either as a business venture or own consumption, and I want to help people understand how to do it well and easy.
Those who understand the intricacies of growing garlic will have a competitive advantage that is hard to overstate, and I’d wish to provide a robust framework for thinking about it.
Let’s dive right in:
More...
Introduction
First things first:
Some rather boring stuff about what garlic really is and a bit of history.
Garlic, scientifically known as Allium sativum, is a species in the onion genus, Allium. Its close relatives include the onion (Allium cepa), shallot, leek, chive, and Chinese onion.
With a history of several thousand years of human consumption and use, garlic is native to Central Asia and north-eastern Iran, and has long been a common seasoning worldwide.
It was known to Ancient Egyptians, and has been used both as a food flavouring and as a traditional medicine - Wikipedia
Known for its particularly pungent taste and aroma, garlic is one of the world's oldest cultivated plants and has a history as a foodstuff that dates back as far as ancient Egypt.
Garlic also has a storied cultural history as an herb believed to have protective powers capable of warding off evil!
I know this sounds crazy:
But those are the kind of stories that have been going on for decades.
However, garlic's real benefits are its positive correlations in assisting with cardiovascular health and cancer prevention.
As a culinary ingredient, garlic is typically used to make sauces or to season meats, seafood, vegetables, and other dishes, but it can also be enjoyed roasted on its own or eaten raw.
One of the most widely used and easily recognizable foods, garlic is an important ingredient in many culinary dishes from around the world.
Why did I write this guide?
There is a revolution taking place in the world of growing garlic either as a business venture or own consumption, and I wanted to help people understand how to do it well and easy.
Those who understand the intricacies of garlic growing will have a competitive advantage that is hard to overstate, and I wanted to provide a robust framework for thinking about it.
How about the demand?
The average garlic consumption per capita per year is 2.0 pounds. This is according to Agricultural Marketing Resource Centre
There has been a steady increase in demand for garlic because garlic has been attributed to both an increased affinity for its flavor and the promotion of the health benefits, which include antibiotic as well as antioxidant effects, and aiding in the reduction of cholesterol and blood pressure levels.
The more reasons to justify my interest in writing this comprehensive guide.
Who is this guide for?
This guide is for Agribusiness entrepreneurs, home gardeners, gardening newbies, or anyone else who is trying to grow a garlic for fun.
If growing garlic for money (and supplementing your existing income) is important to you then you should read this guide.
If financial freedom and health matter to you, then garlic growing should matter to you.
How to get the most out of this guide
Each sub section is a standalone mini-guide that can be read in isolation, but to get the most of the guide it would make sense to read it all the way through at least once, and then return to it as a reference resource when needed, but, that’s only if you bookmark it 🙂
Garlic Growing Fundamentals
There are three main types of garlic:
- Hardneck (or stiffneck),
- softneck, and
- Great-headed (or elephant).
Hardneck varieties produce a flowering stalk surrounded by underground cloves.
These varieties are generally considered to be the most flavourful type of garlic and, as such, are typically favored by professional and amateur chefs alike.
Hard neck though not very common, has some purple markings.
The plant produces few but bigger cloves per head. Just like soft neck variety, the hardneck has a strong taste and smell. In comparison, hardneck has a shorter storage life than the softneck garlic.
Varieties within this group are; German Extra, Hearty and Roja
On the other hand, Softneck varieties do not produce flowers or seeds. Rather, they develop bulblets on their stems.
Softnecks are easier to grow than other varieties and have the longest shelf life. Because of this, softnecks are the type of garlic most likely to be found in supermarkets.
Soft neck is the most common type for vegetable gardens and have a strong taste and smell. Varieties within this main group are California early, California late and creole.
Finally, Great-headed varieties are the least common of the three main types of garlic.
Larger and less hardy than hardnecks or softnecks, great-headed garlic varieties are more closely related to leeks and, as a result, taste more like onions than normal garlic.
Great-headed (elephant garlic) are somewhat common in groceries. Great headed garlics are characterised by very large heads that are comprised of very large cloves. They have a mild odour and subtle flavour compared to hard & soft necks.
Takeaway point: Garlic varieties are very region specific. For example, if you choose to grow a certain garlic variety in a region that isn’t suitable, the plants won’t form bulbs!
Garlic varieties are very region specific. If you choose unsuitable variety for a region, they won’t form bulbs!
Be sure to check with your local Agricultural expert or experienced grower before deciding which variety performs best.
Why Growing Garlic?

Garlic has long been prized for its health benefits. Most of these benefits result from the fact that garlic is an excellent source of many vitamins and antioxidants.
In addition, garlic contains allicin, the compound that gives the vegetable its trademark taste and aroma.
Allicin helps to lower blood pressure and lipids, reduce clotting, and lower the risk of cancer.
Due in part to allicin, garlic is valued for its cardiovascular benefits, and it is thought to help in the prevention of heart disease, heart attacks, and atherosclerosis.
Moreover, garlic is used in ingredients, medicinal applications e.g. prevention of acne, as mosquito repellent, an antibacterial product and also used as an aphrodisiac!
Garlic is also known to be helpful in the prevention of various types of cancer, including breast cancer, stomach cancer, and prostate cancer.
Some studies even suggest that garlic can help in preventing the common cold.
According to the National Centre for Complementary and Integrative Health, garlic supplements are among the top 10 most used natural products especially in the US.
Recommended: Is Organic Farming Superior to Conventional farming?
The beginning of successful garlic growing
Soil Testing
This is the first exercise you need to conduct before preparing the land for planting garlic.
Collect soil samples randomly (with help from an expert) from your farm for analysis in order to know the status of the soil.
This will help you know whether the soil is infected with soil borne diseases or not, and whether the soil PH is ideal for growing garlic.
If your soil attains a PH range of 5.0 to 7.5 ( not too high or too low) and has no infection of soil borne diseases, then know that it’s ideal for growing your garlic and hence proceed with land preparation.
Low soil PH (below 5.5) is mostly experienced in soils that have been under prolonged fertilization and irrigation, and so your soil therefore has higher chances of becoming acidic and hence not favourable for garlic farming.
When your soil has a low PH, the availability of several micronutrients such as iron, manganese and aluminium in the soil increases thus increasing the toxicity levels of the soil.
Alongside the soil toxicity increasing, there is a decrease in the availability of essential nutrients like Magnesium, Calcium, and Potassium etc. a condition that might result in your garlics developing deficiencies.
Under such cases, you have several ways (not limited to the ones below) by which you can raise your soil PH to/ above 5.5 as below;
How to correct soil acidity
1. Adding lime to the soil
Purchase the agricultural lime of your choice obviously after consultation from an agricultural expert on the soil analysis results.
Apply the agricultural lime either by hand (for a small portion of land or by a spreader for a large portion of land) to the soil and ensure that you mix it well with the soil media by raking or by use of a rototiller up to several centimetres (18 cm) deep.
This is due to the fact that solubility of some lime compounds is relatively low.
Carry out lime application process at least 2-3 months with regular watering prior to planting in order to give it enough time to be effectively absorbed.
Lime comes in different compounds from which you can choose.
- Hydrated lime which is used strictly to extremely acidic soils which is a rare condition on most soils. This compound is highly water soluble and increases the soil PH very quickly.
- Granulated lime which is not finely ground hence easier to spread through the soil. This type of lime is not as effective as pulverized lime.
- Pulverized lime is a very fine ground and it’s easily absorbed into the soil though difficult to apply.
- The other type of lime is dolomite (a mixture of Magnesium & Calcium carbonates), contains some micro nutrients but this should be used only in cases when the soil has deficiencies.
2. Using wood ash.
At times you may opt for wood ash in raising the soil PH though this is will take a very long time to take effect. Also this method is not that effective for large portions of land.
How to correct soil alkalinity (salt levels)
Other times your soil analysis may show results of a pH higher than 8.5 meaning that you will need to lower the pH to ideal range of 5.0 - 8.0. Lowering the pH means that you will be increasing the soil acidity levels.
And how will you do this?
There are several ways to do this and below are some of the ways:
1. Decreasing / lowering the soil pH by gradually applying sulfur
The effectiveness of decreasing the soil PH using sulfur depends a lot in several factors like soil temperature and moisture. You need to carry out regular watering in order to achieve close to regular moisture and temperature conditions.
The process may take several months (even above 3 months) though it will finally lower the soil PH.
2. Adding aluminium sulphate into the soil.
This is the fastest way of lowering soil PH (increasing the acid levels).
This compound creates prompt changes to the soil through the chemical reactions involved with aluminium sulfate.
However you need to be careful while using aluminium sulphate in lowering the PH since the change can be so drastic that you might have difficulties when controlling acidity levels of your soil. Hence the 50/50 preference by majority of gardeners.
3. Organic materials to lower the soil pH.
Applying organic matter like compost into the soil will not only improve aeration and drainage but it also lowers the PH gradually.
This is the cheapest, easiest but very slow method that needs one to be patience enough to see the result.
Acquiring the planting material
Purchase the cloves from a recognised dealer (Seed Company) not from a grocery so as not to buy diseased cloves or varieties that will not suit your area. Most of the cloves from groceries are mostly treated to lengthen their shelf life and may take longer than expected to grow.
A few days (not longer than 24 hours) before planting day, break apart the cloves carefully without causing any injury.
This will make planting easier and minimize time spent in the fields.
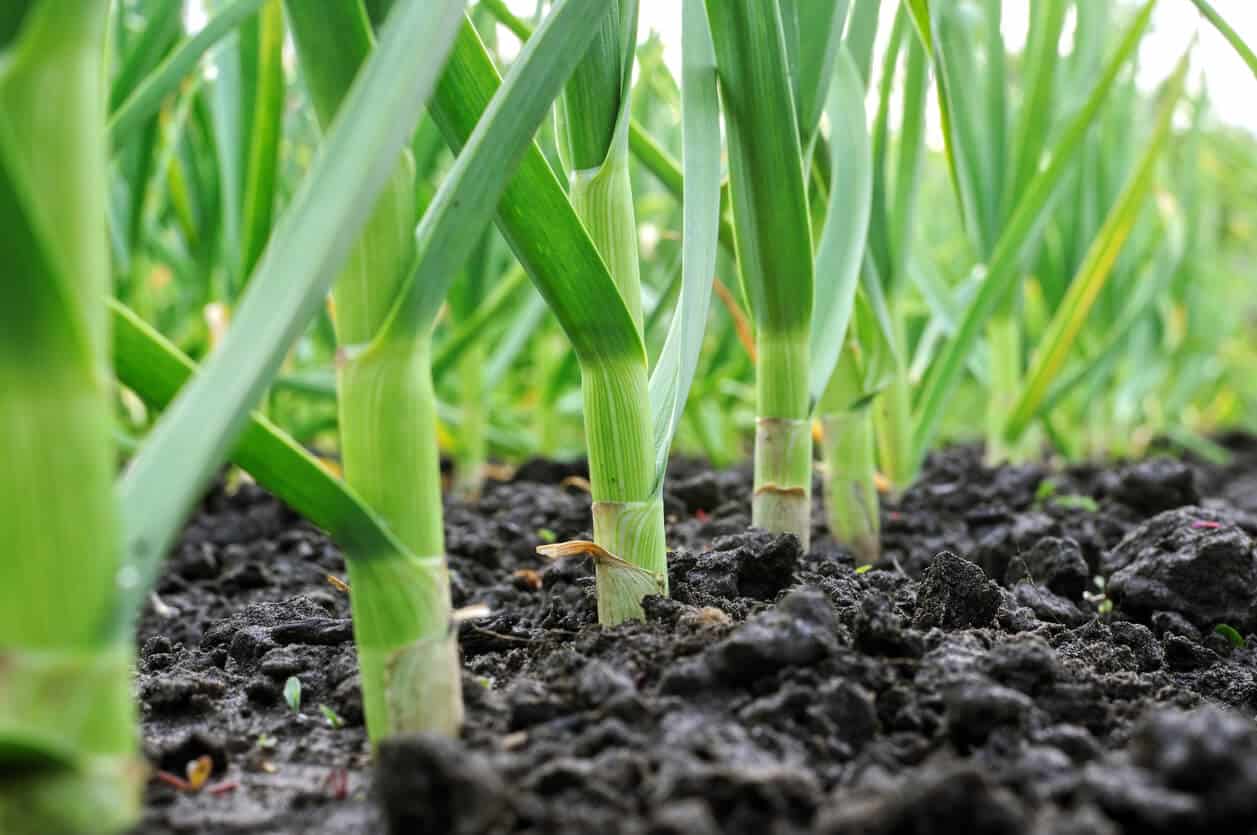
Land preparation & planting.
Having amended your soil, now it’s the correct time for you to prepare the land for planting.
Garlic requires relatively smooth textured growing media, so you need to first thoroughly plough and harrow the land removing any debris.
Also ensure that the area where you will be growing the garlic has enough sunlight penetration hence avoid shady areas.
Shady areas encourage the soil to hold excess moisture and this can lead to your garlic plants developing rots like basal rot and (Botrytis porri) botrytis rot.
Prepare raised seed beds on ridges at a spacing of 25-30 cm between rows and 15-20 cm between the plants.
With this spacing you will manage at least 150,000 plants in a hectare of land with planting 150-200 kg of cloves.
Use DAP fertilizer at the time of planting in case you do not have farm yard manure.
Ensure that you place the cloves at a considerable depth (at least 3 cm deep) in order to be fully covered with soil with the roots facing downwards and the sharp edge facing upwards.
In some varieties, large cloves may actually be two cloves fused together, known as a "double."
These doubles will produce two bulbs that become flattened as they grow together.
The result is less marketable and poorly shaped bulbs.
Plant the cloves with the pointed side up.
If you plant the cloves upside down they will develop a curved shoot that results in misshapen bulbs.

Garlic plant that results from a clove planted upside down.

Fused garlic bulbs as a result of planting a double clove.
Key takeaway: Make sure to separate individual cloves from the bulb the day of or up to two days before planting. If you separate the cloves longer than two days they will dry out.
Separate individual cloves from the bulb the day of or up to two days before planting.
A recap on growing garlic
- Garlic can be planted in the spring as soon as the ground can be worked, but fall planting is recommended for most gardeners. Plant in the fall and you’ll find that your bulbs are bigger and more flavorful when you harvest the next summer.
- In areas that get a hard frost, plant garlic 6 to 8 weeks before that frost date. In southern areas, February or March is a better time to plant.
- Break apart cloves from bulb a few days before planting, but keep the papery husk on each individual clove.
- Plant cloves about one month before the ground freezes.
- Do not plant cloves from the grocery store. They may be unsuited varieties for your area, and most are treated to make their shelf life longer, making them harder to grow. Instead, get cloves from a mail order seed company or a local nursery.
- Ensure soil is well-drained with plenty of organic matter. Select a sunny spot.
- Place cloves 4 inches apart and 2 inches deep, in their upright position (the wide root side facing down and pointed end facing up).
- In the spring, as warmer temperatures come, shoots will emerge through the ground.
Read: Effective Hacks for Growing Garlic Indoors
How to care for your garlic
Mulching
Applying mulch is optional but it’s advisable to apply mulch when the weather is dry in order to retain some moisture for faster sprouting.
Northern gardeners should mulch heavily with straw for overwintering.
Mulch should be removed in the spring after the threat of frost has passed. (Young shoots can’t survive in temps below 20°F on their own. Keep them under cover.)
As a rule of the thumb, remove the mulch as soon as the cloves start sprouting to give more space for the shoot development.
Fertilizer Application and Top Dressing
Garlic requires adequate levels of nitrogen. Fertilize accordingly, especially if you see yellowing leaves.
Top dress your garlic with NPK during the 5th or 6th week after sowing.
Continue with the process up to 8th week or up until when the bulbs start to form.
Apply foliar sprays to boost the crop growth while you watch your crop closely to notice when the bulbs start forming and stop the foliar application. (Remember you need more of bulbs and not leaves)

Nitrogen deficient garlic. Note symptoms of pale yellow leaves.

Nitrogen sufficient garlic. Note dark green leaves.
Watering
Garlic has a relatively shallow root system and is sensitive to dry soil conditions.
The amount of water to apply will depend on soil type. Irrigation is essential on sandy soils and may be beneficial in some years on finer textured soils.
Enough irrigation should be provided so that the available water holding capacity does not drop below about 50 percent.
The most critical stage for irrigation is during bulbing
Water your garlic regularly during growth period to give the crop enough moisture for bulb expansion.
Water every 3 to 5 days during bulbing.
At no given time should you allow your growing garlic to be exposed to drought as this not only affects the bulb quality but also predisposes the crop to pests/ insects infestation.
Weeding
Garlic is a poor competitor with weeds. Unless weeds are controlled early, they can easily overtake young garlic plants, causing significant yield losses.
Remove weeds as soon as they appear either by hand hoeing or hand weeding in case you have mulched your crop.
Weeds are capable of reducing garlic yield with 50% by competing for nutrients with your garlics and also by providing habitat for pests, disease causing agents and insects.
Be sure to use straw free of weed seed as mulch.
Removal of scapes
Hardneck garlic is popularly known to form the scapes. Therefore, you need to make a decision regarding the scape removal.
Several studies shows that yields can reduce by 20 percent to 30 percent if the scape is allowed to mature.
Furthermore, the studies reveal that yields are most affected in poorly fertilized soil, and only minimally (< 5%) affected in high organic matter, well-fertilized soil.
The appropriate time to remove the scapes is just after the initiation of curling.
There is some circumstantial evidence to suggest, however, that bulbs store better if the scape is left on until it turns woody.
For this reason, you should only leave the scapes on if a market for the bulbils is available to offset the loss in bulb yield.
Pest and Disease control in growing garlic
Diseases
1. White rot (Sclerotium cepivorum)
In general, garlic is a very resilient plant, and it is naturally resistant to most pests. But still, it is susceptible to white rot, a fungus that attacks the base of the plant's leaves and roots.
Soil borne fungal disease characterised by white cotton like growth at the base of the garlic stems which later leads to death of foliage of the infected plants.
Ensure that you carry out crop rotation every season with crops that do not belong to the same family as alliums to prevent infection.
2. Bacterial soft rot
This soil borne disease mostly affects the mature bulb and is also transmitted through infected plant debris and planting materials.
Bulbs develop water soaked scales that latter turn from pale yellow to light brown.
With time as infection continues, the fresh scales becomes more sticky and soft and the inside the bulb becomes completely destroyed.
3. Rust (Puccinia porri)
Rust in garlic is characterised mostly by yellow or white spots on the garlic leaves that turns into small orange blisters.
This is an air borne fungal disease that is favoured by high humidity around the crop.
Spray the crop with preventive sulphur compounds.
4. Downy mildew
Your garlic may start showing leaves turning into pale green and with time turns to pale yellow, dark brown and finally dries up.
This should raise alarm to you that your crop has downy mildew.
Downy mildew is caused by a fungi that survives in the soil as well as in plant debris.
Ensure that the hygiene of your garlic farm is top notch by weeding and removal of infected plant debris.
5. Basal and bulb rot (Fusarium bulb/basal rot)
This disease is caused by a soil borne fungus.
If you come across some of the garlic bulbs rotting from the bottom towards the top of the bulb, then there is a possibility that your garlic bulbs are have fusarium basal rot. (Fusarium oxysporum and Fusarium culmorum).
This disease is also characterised by deep reddish pigmented lesions at the basal plate.
Fusarium bulb rot is a fungal disease caused by fungi Fusarium proliferatum.
This disease is characterised by water soaked lesions that form all over the cloves whit later makes the bulb to rot and finally decay.
Rogueing any diseased plant that you come across helps control the infection.
Make sure you use clean disease free planting material and also ensure you rotate your garlic with non- alliums every season as this is also a good way of controlling infection.
6. Black mould
This disease is a fungal infection caused by Asperagus species. The fungi can be soil or air borne as well as found in infected plant debris.
Black mould develops mostly in the plant stage where the foliage starts to die downwards through the neck at maturity.
The garlic bulbs shows discolouration and blackening around the neck and the bulb scales shrivel. Thereafter black powdery spores develop on the bulbs.
Ensure that you exercise high levels of field and crop hygiene by rogueing any infected plant once spotted.
7. Blights
This is a fungal disease that mostly is soil borne and sometimes can be found in infected plant debris.
Blight in garlic is characterised first by water soaked spots on the leaves. These spots are usually pale yellow in colour.
The spots spread throughout the leaf lengthwise until the infected leaves shrivel and die.
Field hygiene by regular weeding and rogueing of infected plants plays a major role in control of blight in garlic.
This disease can also come with signs and symptoms of anthracnose.
Pests
1. Thrips
Thrips are the most common pests that you find in garlic crop. These pests attack the garlics, suck the sap from the plants slowing down plant growth and bulb development.
Ensure that you carry out regular weeding and maintain field hygiene in order to reduce the chances of thrips attacking your garlic.
Under severe cases of thrip infestation carry out chemical spray to curb the situation.
2. Wire worms
These are the larvae of beetle in the soil. Wire worms feed extensively on the roots leading to your garlic showing stunted growth finally low yield.
Wire worms mostly affect the cloves and when the crop matures they hide deeper into the soil.
You can control wire worms by planting a trap crop like radish/wheat along the field boarders to trap the wire worms.
Harvest the entire trap crop once it reaches maturity and you will be able to see trapped wire worms and this way you will have protected your garlic from infestation with wire worms.
3. Mites
These are whitish, globular and shiny usually found crowded together at the roots and bulbs. These insects feed on the roots as well as the bulbs causing stunted growth and low harvest. Garlic mites survive for more than a season and hence the need for you to carry out crop rotation every season. Alternate the alliums with non – alliums. Crop rotation will help you control garlic mites.
4. Leaf Miners
Leaf miners hatch eggs within the leaf tissue then these eggs develops into larvae which forms tunnels in the leaf and cause visible damage to your garlic.
Leaf miners will affect the leaves thus food manufacture for the developing bulbs reduce hence low or poorly developed bulbs.
Field hygiene through regular weeding and rogueing of infected plants will help you control leaf miners.
You can also opt for chemical spray especially when the leaf miner population is too high or if the spreading of the insect is rapid
5. Nematodes(soil borne pest)
Nematodes are microscopic pests that live in the soil and can survive for several years.
They feed on every part of the garlic plant resulting into discoloration, deformation, tissue damage and stunted growth.
The effect of nematode infection is not instant and can take years to start showing but this will be too late and the whole crop will be destroyed.
Carry out soil test on the health status of your soil and see if there any nematodes before proceeding with planting your garlic.
Related: 12 Plants That Attract Ruthless Good Bugs
Maturity, harvesting and storage
In about 6 to 7 months, your garlic will start showing maturity signs.
These signs include yellowing and drying of the tops and the bulbs cracking into several cloves just like the ones you started with when planting.
Using a folk, lift the entire plant from the ground with a lot of care not to damage the bulbs.
Place the bulbs in the open air under a shade for at least 10 days or until the bulbs are completely dry and store them awaiting to be sold.
Key takeaway: Typically, yields of garlic planted in double rows of 30 inches apart will range from three tons to five tons per acre. Higher yields can be attained with closer spacing and the use of herbicides to control weeds.
Typically, yields of garlic planted in double rows of 30 inches apart will range from 3 tons to 5 tons per acre.
Note: Cut off any flower shoots/scape that emerge in spring. These may decrease bulb size.
Recap
- Harvest time depends on when you plant, but the clue is to look for yellow tops. Harvest when the tops begin to yellow and fall over, before they are completely dry.
- In Northern climates, harvesting will probably be in late July or August. In Southern climates, it will depend on your planting date.
- Check the bulb size and wrapper quality; you don’t want the wrapper to disintegrate. Dig too early and the bulb will be immature. Discontinue watering.
- To harvest, carefully lift the bulbs with a spade or garden fork. Pull the plants, carefully brush off the soil, and let them cure in an airy, shady spot for two weeks. We hang them upside down on a string in bunches of 4 to 6. Make sure all sides get good air circulation.
- The bulbs are cured and ready to store when the wrappers are dry and papery and the roots are dry. The root crown should be hard, and the cloves can be cracked apart easily.
- Once the garlic bulbs are dry, you can store them. Remove any dirt and trim off any roots or leaves. Keep the wrappers on—but remove the dirtiest wrappers.
- Garlic bulbs may be stored individually with the tops removed, or the dried tops may be braided together to make a garlic braid to hang in the kitchen or storage room.
- Bulbs should be stored in a cool (40 degrees F), dark, dry place, and can be kept in the same way for several months. Don’t store in your basement if it’s moist!
- The flavor will increase as the bulbs are dried.
- If you plan on planting garlic again next season, save some of your largest, best-formed bulbs to plant again in the fall. Source: Almac
Summary tips
1. Buy a good quality garlic bulb from a reliable source.
Seed garlic is specially selected for growing so you'll get better results than simply buying a bulb from the grocers as this may have been treated with anti-growth chemicals.
2. The best time to plant will depend on the variety.
Some are autumn planting, some are spring planting. If you're unsure, November or December are good months to plant.
3. Choose the sunniest spot available to plant your garlic.
Well-draining soil is best.
4. Break your bulb into cloves just before planting them at about a bulb's depth underground or in a pot.
5. Water well but don't flood.
Watering is important in the spring when the bulb is starting to swell.
6. Harvest time will be from late June to early August depending on the variety.
The best time to harvest is when the stem is lying on the ground. Or for hardnecked varieties, when most of the leaves have turned brown.
7. Pull the bulbs up and dry out well in a glasshouse or on a window sill.
8. Enjoy your beautiful bulbs which will last for months if you store in a warm, dry, well-ventilated place.
Recommended: Urban Farming for Beginners: How to Earn More Money on Less Land
Conclusion
There’s no denying it:
Growing garlic the right way is HARD.
That’s the bad news.
The good news is that I’ve taken the heavy lifting out of the way and come up with this definitive guide…
Now It’s Your Turn
I hope you’ve enjoyed my new guide to Growing Garlic for Beginners. What did you think of the guide?
Or maybe you have a question or something to add.
Either way, let me know by leaving a quick comment below right now.
thanks for the help
You’re most welcome 😉
Perhaps you meant to say ” Aspergillus” instead of “Asparagus” as the Black Mold species?
Please set these informational articles so that we can print them without all the ads. They take to much paper to print. For example this garlic article will require 16 sheets of paper.